Affinity Photo: Blur Background
A blurred background draws the attention to what should be the focus of the picture. While taking a photograph, a len's aperture needs to be wide open to obtain a shallow depth of field, or blurry background. Photographers often use portrait lenses for the purpose. There is the f-stop number to measure it. Apertures corresponding to f-stops like f/1.4, f/2.8, f/3.5 .. are larger than apertures which correspond to f-stops like f/8, f/11, f/16, etc. The narrower the aperture, the larger the depth of field. And the larger the depth of field, the less blurry the background. That is why you will find portrait lenses with f-stops like f/1.2 and f/1.4 much costlier than those with f/1.8 and greater.
Now we can achieve the same in some image editors, without the use portrait lens. In this tutorial we will learn how to blur backgrounds in Serif's Affinity Photo.
1) We first launch Affinity Photo.
2) Next click File > Open... and open the image whose background you want to blur (you can also press ⌘ + O)
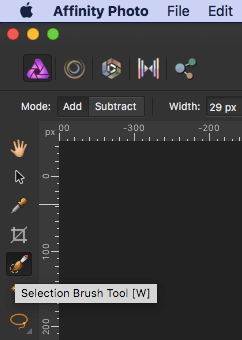
3) The goal is to first use the Selection Brush Tool to trace out an object in the image you do not wish to blur, inverse the selection and blur the rest of the image (which is the background). In the Photo Persona (default), pick the Selection Brush Tool.

4) Drag over the object in the image you do not wish to blur and trace out a selection. The selection area expands with each drag (assuming Mode is set to Add, which is the default).
5) Now it is possible that the selection can spill over undesired areas of the image. If there is a spill in selection, change the Mode to Subtract and reduce it.
6) Now the edges of this drag selection can actually be refined. This usually applies to objects like strands of hair or feather on its edges, which all require finer selection. For this purpose, we have the Refine... button that appear in the context toolbar.
7) An overlay with red background covers the region outside of the selected area and a dialog box titled Refine Selection pops up on the side.
8) But the red umbrella makes it harder to differentiate with the overlay, so we change the Preview dropdown to Black matte.
9) Now we get back to the Refine Selection dialog box. To get a finer selection of the edges, we have to make some adjustments in it. This however is a discussion for another tutorial and here we go along with the default values. Now with the adjustment brush, paint over the edges which need to be refined. We choose the hair area below.
10) Now that we have the fine selection of the object which we do not wish to blur, we invert the selection which is the portion to be blurred. Click on Select on the Menu Bar and choose Invert Pixel Selection.
11) From the Layers panel on the right, click Live Filters.
12) Choose Gaussian Blur or even better Lens Blur, if you desire a bokeh effect.
13) Adjust the radius to get desired amount of blurring on the background. To get rid of the selection, press ⌘ + D.
14) Here is the background of the original picture (L) vis-a-vis the blurred background on the right.